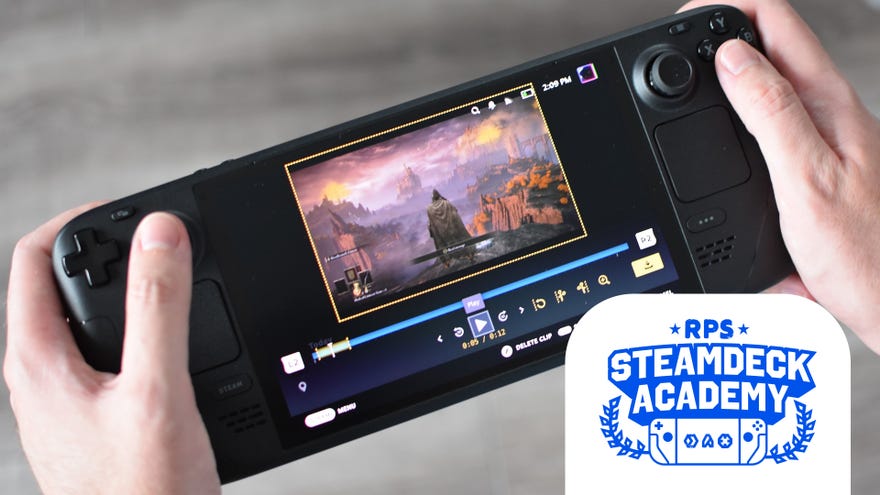
How to record game clips on the Steam Deck
Clip and share your Steam game adventures (or mishaps) on the move
Anyone wanting to know how to record game clips on a Steam Deck may have been unpleasantly surprised by the lack of solid screen capture options on Valve’s handheld. It certainly took me ages to find a decent recorder, ultimately settling on a Decky Loader plugin, but even that’s a bit on the basic side. Luckily, the Deck makers themselves have stepped in, launching a Steam Game Recording beta that anyone can access – and more importantly, extends to the Steam Deck and SteamOS.
Now, finally, your portable PC has a well-equipped factory for producing smirk-inducing game clips built right into its operating system. And this guide will explain, in simple steps, how to get it set up, how to capture footage using its two recording modes, and how to save or share your clips with your pals.
First, though, a few observations, based on my time with Game Recording on the Steam Deck so far. While this is largely the same set of tools as Game Recording offers on the desktop Steam client, is has been pared back a smidge for the dinky Deck. Basically, there’s no omnipresent video timeline on the SteamOS overlay, as there is on desktop, so instant replays aren’t quite so instant. Still, you can open up both background recordings and previous clips via a new section in the Steam button menu, so the same in-game viewing and sharing features are still present. They just take a couple of extra button presses to reach, is all.
What might be more concerning is that whereas beefy desktop PCs can offload the strain of game clip recording to a dedicated graphics card, the Steam Deck – and its fully integrated APU – doesn’t have that luxury. As such, you’re more likely to see a slight performance dip when recording. Anecdotally, I seem to lose about 3-4fps while Game Recording is active; that might not sound like a lot, but if your game is a tough AAA number that can only just run at 30fps normally, that lil’ reduction could take you down into the sluggish twenties. Conversely, games that can comfortably hit 50-60fps (or higher, on the 90Hz Steam Deck OLED) won’t really feel it.
Another benefit of the desktop client over the Steam Deck’s Game Recording is that the former is much better with non-Steam games; as long as you can manually add a game to the Steam launcher, you can record it, but that’s not reliably so on the Steam Deck. Here, it actually wigs out somewhat, recording the audio of non-Steam games (like those installed via Lutris) but not the video. It also regularly defaults to the Record in background mode, even when the manual Record on demand mode was enabled beforehand.
So yeah, right now there are some rough edges that the desktop version has already sanded down. But hey, it’s only a beta for now, and I haven’t seen any of these hiccups occur With true-blue Steam games. Of which, your Steam Deck library is almost definitely heavy on.
How to record game clips on the Steam Deck
Step 1: Press the Steam button and navigate to Settings > System. Under "Beta Participation", select the Beta option, then "Restart Now". If you’re already using the Beta client, or are reading this in the future when Game Recording has made it into the Stable client, you can skip this step.
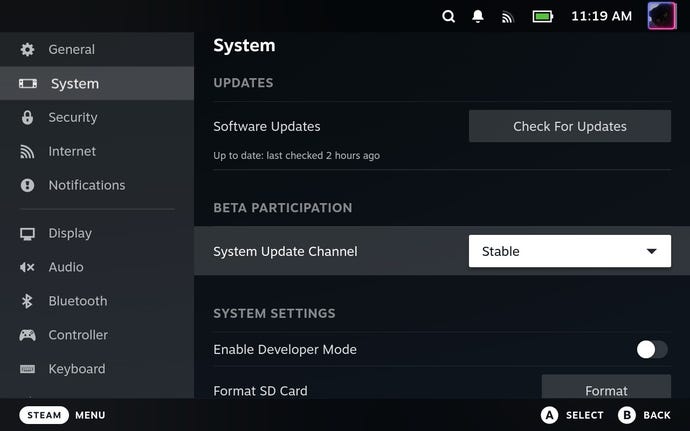
Step 2: Your Steam Deck will take a few minutes to install the beta and reboot, so just let it do its thing. Once restarted, head back into the Settings menu again and scroll down until you reach the new Game Recording section. Just like on Steam’s desktop client, you can choose between the Record in background and Record on demand modes.
Once you’ve selected a mode, some additional settings will appear below. Most of these you can leave on their defaults, but feel free to customise the recording quality – higher-quality footage will look clearer, but eat up more storage space – and, for background recording specifically, the recording length and size limits. If you exceed these, background recording won’t stop, but will start overwriting older footage. Be warned.
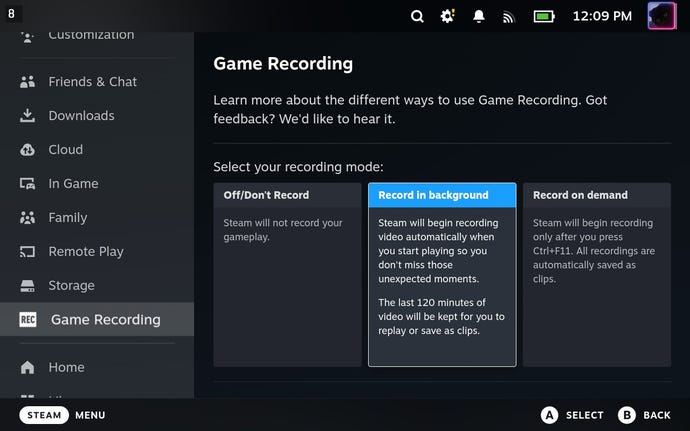
You can also change the timeline marker shortcut (Steam + Y by default) and, in Record on demand mode, the start/stop recording shortcut (Steam + A by default).
Once you’ve selected a mode, you’re ready to launch a game and get recording. First, we’ll go over how to use Record in background most effectively, then switch to Record on demand mode.
How to record game clips on the Steam Deck: Record in background
Step 3: Simply launch a game and Steam will start recording in – yes! – the background. This is fully automatic, and recording will end itself whenever you close the game. At any point, you can use the timeline marker shortcut to drop a blue marker on the background recording’s timeline – to help you find a particularly entertaining moment, say – but you don’t need to worry about manually starting and stopping the capture process.
You also don’t need to wait to start viewing, editing, and sharing clips. While playing, hit the Steam button, then navigate to the right and down to the Game Recording section. Here, you can select "View Background Recording" to immediately review your current recording-in process, or "View Recordings" to watch back older recordings. The "Recording Settings" button will also let you tweak the Record in background settings mid-game, or to switch to Record on demand mode.
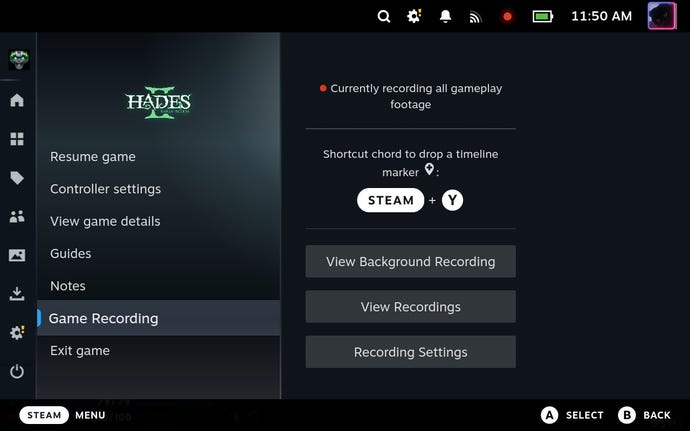
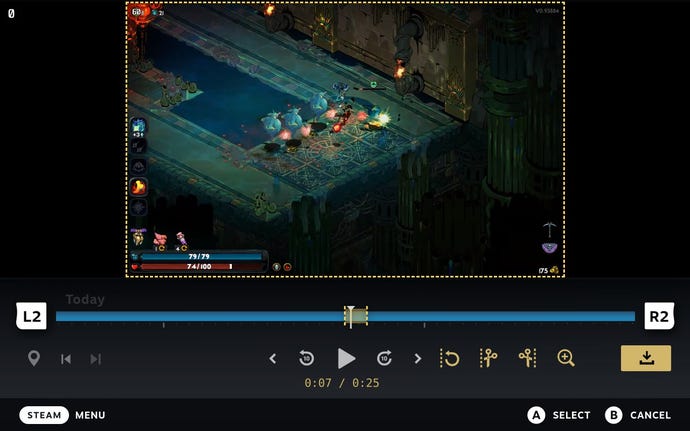
Step 4: When viewing a recording, tap the Y button to bring up the timeline and editing menu. Full details on clipping and publishing are below, in the "How to edit and share clips" section, but in short: use the L2 and R2 buttons to skip forward and back, and separate clips can be saved by using the scissor-icon Start Clip and End Clip tools to highlight a section of the timeline in yellow. From there, tap the big yellow Save/Share button in the bottom-right corner; you’ll be offered options to save the clip to your Deck, share it online, or send it to another PC that you’ve signed into Steam with.
How to record game clips on the Steam Deck: Record on demand
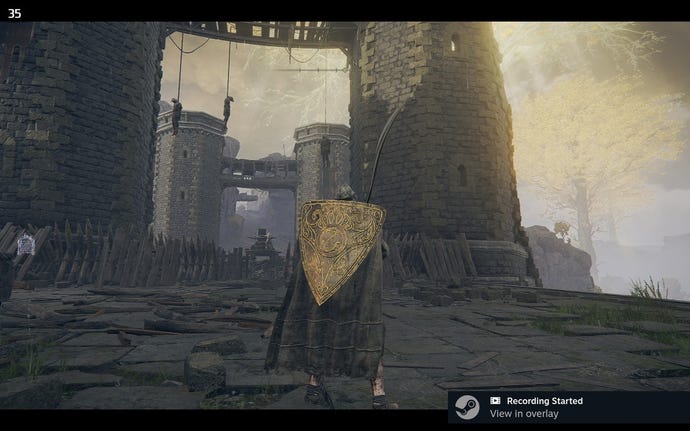
Step 3: While playing a game, press your "Start/stop recording" shortcut – remember, unless you changed it that’s Steam + A. Just use the same shortcut again to stop recording, and boom, you’ve got a clip. You can look out for the pop-up in the bottom-right corner to confirm that clipping has started and finished.
To watch clips back without leaving your game, press the Steam button, navigate to the right and then down so that you can access the Game Recording overlay menu. Select "View recordings" and you’ll get a library of all your previous clips for that game.
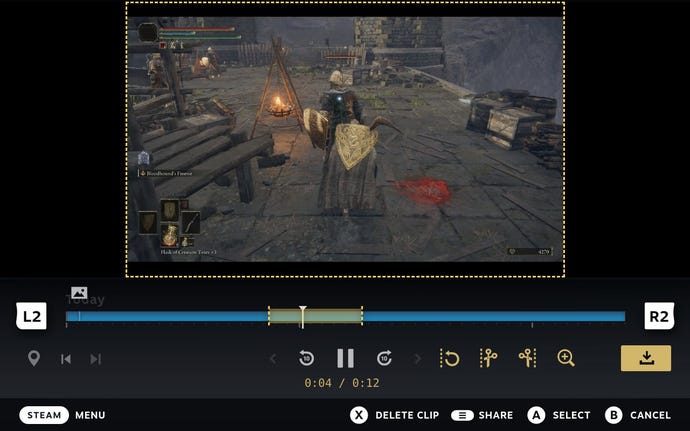
Step 4: Press the Y button to bring up the full playback and editing interface. You can use L2 and R2 to rewind and fast forward, or select the scissors icon to snip the clip into a shorter version. More on this in the next section, but do make sure that if you make any edits, be sure to save the new clip by tapping the yellow Save/Share button and choosing one of the options.
How to edit and share clips
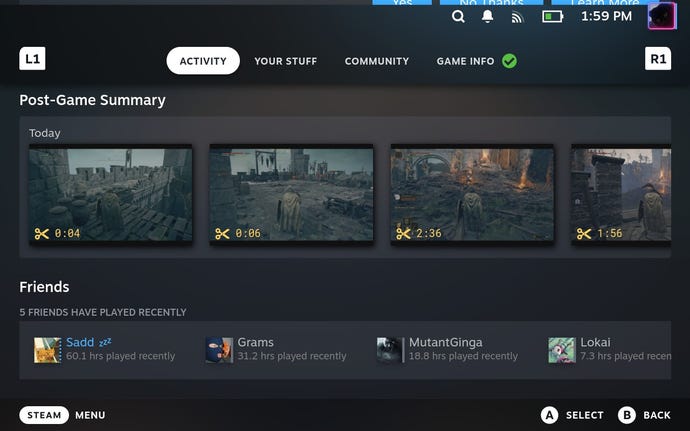
Step 1: Open up your clip, or background recording. All of these are accessible either from within the Steam overlay (using the aforementioned Steam button > Game Recording > View recordings route) or in the Library page of the game they were recorded in. Recent recordings are clearly visible at the top of the Activity section; older clips will be under the Your Stuff tab. Scroll down to the Media section if you can’t immediately see these.
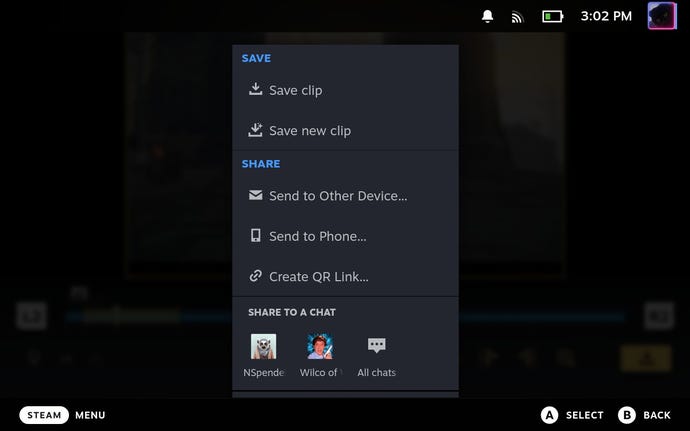
Step 2: Select your clip and press the Y button to open the timeline interface. If you just want to share a clip as it is, with no additional editing, tap the button on the very far right (with an arrow point upwards). If your clip is under 60 seconds long, you can select "Sent to Other Devices", which sends the clip to another PC you’ve signed into Steam with; "Send to Phone", which send it to the Steam app on your phone; "Create QR link", which provides a QR code you can scan with your smartphone camera to view the clip in a browser; or "Share to a chat", which can pop the video directly to your Steam friends and group chats.
If the video is over 60 seconds, you can still send it to another device, but not send it to your phone, create a QR code, or share via Steam chat.
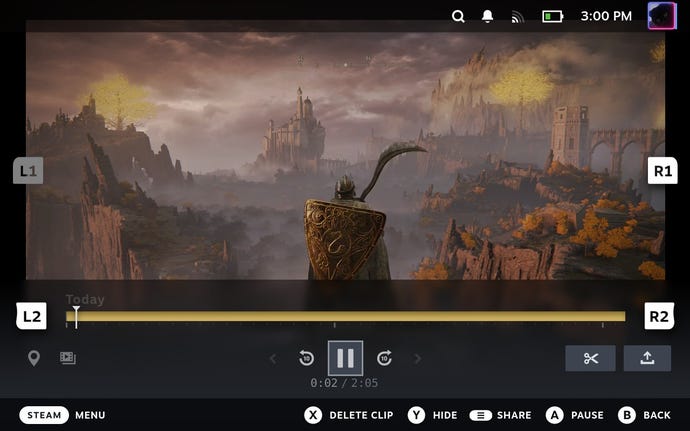
Step 3: If, on the other hand, you want to trim down a clip (or extract one from a background recording), you’re gonna need the editing interface. Start by selecting the scissors icon that appears on the Y button menu. Here, use L2 and R2 to move the timeline’s playback indicator to where you want to start the clip. Tap the "Start Clip at Current Playback" icon, which is the pair of scissors cutting through a dotted line on the left.
Then, move the playback indicator to where you want to end the clip, and tap the "End Clip at Current Playback icon" – that’s the scissors cutting into a dotted line on the right. The blue timeline bar should now have a yellow section, representing your clip.
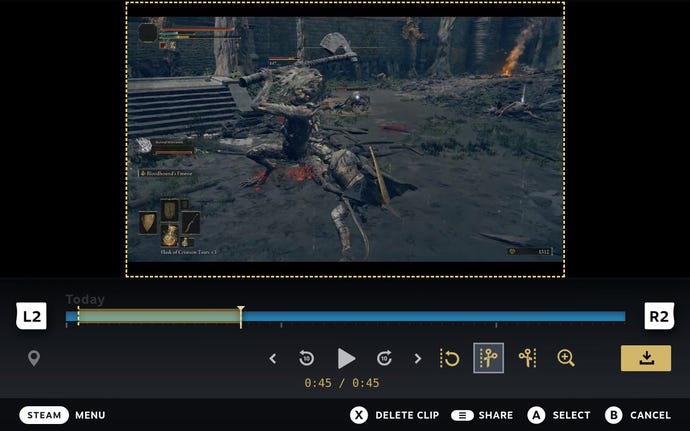
Step 4: Tap the yellow Save/Share button and choose an option. "Save clip" will replace the full-length clip with your new, shorter version, while "Save new clip" (or "Save clip to Media" if you’re editing a background recording) keeps both the new clip and the original footage. The other four sharing options are the same ones explained in step 2 above.
Sadly, the Steam Deck has no way to export your clip as an MP4 file, like the desktop client’s Game Recording feature does. You could, however, use the "Send to Other Device" option to share it to your PC, then access and create an MP4 from it there.
